Whether you're a weekend warrior, daily commuter, or competitive cyclist, understanding how to properly clean, lubricate, and assess your drivetrain is essential knowledge. In this comprehensive guide, we'll walk you through everything you need to know about maintaining your bicycle drivetrain, from basic cleaning techniques to specialized care for modern electronic systems.
By following this guide, you'll be able to:
- Extend the life of your chain, cassette, and chainrings
- Improve shifting performance and power transfer
- Reduce noise and eliminate drivetrain issues
- Save money by preventing premature component wear
- Maintain peak performance in all riding conditions
Let's dive into the essential knowledge and techniques that will keep your drivetrain running smoothly for thousands of miles.
Understanding Your Drivetrain Components
Before diving into maintenance, it's important to understand the key components that make up your bicycle's drivetrain and how they work together:
Chain
The chain is the most critical component of your drivetrain and requires the most frequent maintenance. Modern bicycle chains consist of outer plates, inner plates, pins (or rivets), and rollers. The chain transfers power from the chainrings to the cassette and is the component most susceptible to wear and contamination.
Cassette/Freewheel
The cassette is the cluster of sprockets mounted on your rear wheel. It works with the chain to provide different gear ratios. Cassettes typically have between 8 and 13 sprockets depending on your bike's drivetrain specification. Older bikes may use a freewheel system instead, which combines the sprockets with the ratcheting mechanism.
Chainrings
Mounted to your crankset, chainrings are the front sprockets that drive the chain. Modern bikes may have a single chainring (1x) or multiple chainrings (2x or 3x) depending on the drivetrain design.
Derailleurs
Derailleurs guide the chain between different sprockets to change gears. The front derailleur moves the chain between chainrings, while the rear derailleur guides the chain across the cassette sprockets. The rear derailleur also maintains proper chain tension through its spring-loaded pulley system.
Pulley Wheels
Located on the rear derailleur, these small toothed wheels guide the chain and maintain tension. They're often overlooked during maintenance but play an important role in shifting performance.
Cables and Housing (Mechanical Systems)
Mechanical drivetrains use cables and housing to transmit the shift commands from your shifters to the derailleurs. These components can deteriorate over time and require periodic maintenance.
Electronics (Electronic Systems)
Electronic drivetrains like Shimano Di2 and SRAM AXS replace traditional cables with electronic signals and motors. While these systems require less frequent adjustment, they have their own maintenance needs.
Essential Maintenance Tools
To properly maintain your drivetrain, you'll need to assemble a few key tools and supplies:
Cleaning Tools
- Degreaser: Specifically formulated for bicycle drivetrains. Avoid harsh household degreasers that can damage components.
- Chain cleaning device: A specialized tool that encases the chain and scrubs it with rotating brushes (optional but convenient).
- Brushes: A set of different-sized brushes, including an old toothbrush, for reaching tight spaces.
- Microfiber rags: Lint-free cloths for wiping components and applying lubricant.
- Water and bucket: For rinsing away degreaser and dirt.
Lubrication
- Chain lubricant: Available in dry, wet, wax, and ceramic formulations. Choose based on your riding conditions (more on this later).
- Grease: For pulley wheel bearings and derailleur pivots.
Measurement Tools
- Chain wear indicator: A specialized tool for measuring chain elongation, such as the Park Tool CC-4, Pedro's Chain Checker Plus, or Abbey Bike Tools Hanger Alignment Gauge.
- Digital calipers (optional): For precise measurement of chain wear and component dimensions.
Repair Tools
- Chain tool: For breaking and rejoining chains.
- Master link pliers: For easily opening and closing quick links.
- Allen/hex wrenches: For adjusting derailleurs and removing components.
- Torque wrench: For proper tightening of bolts to manufacturer specifications.
- Cable cutters: For replacing shift cables on mechanical drivetrains.
Replacement Parts
- Quick links: Compatible with your chain for emergency repairs.
- Spare chain: Consider keeping a pre-sized spare chain for your bike.
- Shift cables and housing: For mechanical drivetrains.
Regular Cleaning Routine
A consistent cleaning routine is the foundation of drivetrain maintenance. Here's a step-by-step process for thoroughly cleaning your drivetrain:
Quick Clean (After Every Ride)
- Wipe down the chain: Use a clean, dry rag to remove surface dirt and excess lubricant by holding it against the lower section of chain while backpedaling.
- Check for debris: Remove any visible debris caught in the derailleur pulleys or between cassette sprockets.
- Re-apply lubricant: If the chain appears dry or you hear squeaking, apply a small amount of lubricant after cleaning.
Deep Clean (Every 150-300 miles or when visibly dirty)
- Prepare your bike: Place your bike in a repair stand if available, or flip it upside down (protect the saddle and handlebars).
- Initial rinse: Gently spray the drivetrain with water to remove loose dirt. Avoid high-pressure water that can force contaminants into bearings.
-
Apply degreaser:
- Option 1: Apply bicycle-specific degreaser directly to the chain while backpedaling slowly.
- Option 2: Use a chain cleaning device filled with degreaser according to the manufacturer's instructions.
- Scrub the cassette: Use a cassette brush or an old toothbrush to clean between the sprockets. For stubborn grime, use a rag wrapped around a flat blade (not your finger!) to get between the sprockets.
- Clean the chainrings: Brush the teeth and surfaces of all chainrings, focusing on the spaces between teeth.
- Clean the derailleurs: Use a small brush to clean the derailleur cages, pulleys, and pivot points. Pay special attention to the pulley wheels, where dirt accumulates.
- Rinse thoroughly: Gently rinse all components with clean water to remove degreaser and loosened dirt. Ensure no degreaser remains, as it can affect new lubricant.
- Dry components: Use a clean, dry microfiber cloth to thoroughly dry all components. Consider using compressed air if available, especially for hard-to-reach areas.
Expert Tip
For extremely dirty drivetrains, consider removing the chain entirely using a quick link or chain tool. This allows for more thorough cleaning and prevents pushing contaminants deeper into the links. Soak the removed chain in degreaser, agitate, rinse thoroughly, and dry completely before reinstalling and lubricating.
According to a 2024 study in the Journal of Cycling Science, bikes with regularly cleaned drivetrains showed an average 4-7% greater power transfer efficiency compared to those with dirty drivetrains, highlighting the performance benefits of this maintenance.
Proper Lubrication Techniques
Proper lubrication is essential for drivetrain longevity and performance. Here's how to choose and apply lubricant correctly:
Selecting the Right Lubricant
There are several types of chain lubricants, each designed for specific conditions:
- Dry Lube: Best for dry, dusty conditions. Creates a dry film that attracts less dirt but requires more frequent application. Ideal for desert riding or clean road conditions.
- Wet Lube: Best for wet, muddy conditions or extended rides. More durable and water-resistant but attracts more dirt. Ideal for winter riding, rainy conditions, or off-road adventures.
- Wax-Based Lube: Creates a dry, wax coating that repels dirt and water. Very clean but requires more frequent application and more thorough cleaning before application.
- Ceramic Lube: Premium option containing ceramic particles that reduce friction. Works well in various conditions but typically costs more.
- All-Condition Lube: A good compromise for riders who experience varying conditions or don't want to switch lubricants seasonally.
For specific recommendations, visit our lubricant selection guide for detailed product comparisons.
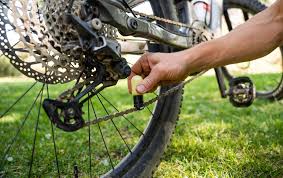
Application Process
- Ensure the chain is clean and dry: Lubricant works best on a clean, degreased chain.
- Apply lubricant to the inner rollers: Place the bottle tip on the inner edge of the chain (facing the bike) and slowly backpedal while applying a thin stream of lubricant. One drop per roller is sufficient.
- Shift through all gears: After application, shift through all gear combinations to distribute the lubricant across the cassette and chainrings.
- Let it penetrate: Allow the lubricant to penetrate for at least 1 hour, ideally overnight. This gives it time to work into the inner links where it's needed most.
- Wipe off excess: Before riding, use a clean rag to wipe off any excess lubricant from the outer plates of the chain. This prevents dirt attraction and buildup.
Expert Tip
Apply lubricant the evening before your ride rather than immediately before. This gives the lubricant time to penetrate the chain links fully, providing better protection and performance. According to Wikipedia's article on bicycle maintenance, over-lubrication is one of the most common drivetrain maintenance mistakes, leading to increased wear due to dirt attraction.
Measuring Chain Wear
Chains "stretch" over time due to wear of the pins and inner link surfaces (not actual stretching of the metal). Regularly measuring chain wear is crucial because:
- A worn chain accelerates wear on more expensive components like cassettes and chainrings
- Replacing a chain before it causes damage to other components saves money in the long run
- A worn chain shifts poorly and reduces power transfer efficiency
Using a Chain Wear Tool
Chain wear (or "stretch") is measured as a percentage of elongation compared to a new chain. Modern tools make this measurement simple:
-
Drop-in style checkers (recommended): Tools like the Park Tool CC-4, Pedro's Chain Checker Plus, or Abbey Bike Tools LL Chain Wear Tool measure true pin wear by isolating roller movement.
- Insert the tool according to manufacturer instructions
- Read the measurement directly from the tool's scale
- Most tools indicate 0.5% and 0.75% wear thresholds
-
Go/no-go style checkers: These simpler tools like the Park Tool CC-3.2 have fixed indicators for specific wear percentages.
- Insert the tool into the chain
- If it "fits" at a certain wear indicator, your chain has reached that level of wear
Using a Ruler (Alternative Method)
If you don't have a dedicated tool, you can use a precise ruler:
- Place a ruler alongside the chain, aligning the zero mark precisely with the center of a pin
- Look at the 12-inch (30.48cm) mark
- On a new chain, the pin at that position should align exactly with the 12-inch mark
- If the pin is past the 12-inch mark, your chain is worn:
- 1/16" past = approximately 0.5% wear
- 1/8" past = approximately 1% wear
When to Replace Your Chain
Replacement thresholds have evolved with modern drivetrains:
- 11-12 speed chains: Replace at 0.5% wear or sooner
- 8-10 speed chains: Replace at 0.75% wear
- Single-speed/internally geared bikes: Can often go to 1% wear
According to a 2023 study from the Journal of Bicycle Engineering, replacing chains at the 0.5% threshold instead of 0.75% can extend cassette life by up to 300% on modern 11+ speed drivetrains.
Expert Tip
Measure your chain in at least three different sections, as wear isn't always uniform. Avoid measuring at the quick link, which often shows less wear than the rest of the chain. For the most accurate readings, clean your chain thoroughly before measuring.
When to Replace Components
While the chain is the most frequently replaced drivetrain component, other parts will eventually wear out too. Here's how to know when it's time:
Cassette
Signs a cassette needs replacement:
- Shark-finned or hooked teeth (viewed from the side)
- Asymmetrical wear patterns on the teeth
- Chain skipping under load, especially after installing a new chain
- Inconsistent spacing between teeth
Typically, cassettes last through 2-4 chains if chains are replaced at recommended intervals. If you've waited too long to replace your chain, you may need to replace the cassette simultaneously with your new chain.
Chainrings
Signs chainrings need replacement:
- Hooked or shark-finned teeth profiles
- Visible wear on the side of the teeth where they contact the chain
- Chain dropping frequently despite proper derailleur adjustment
- Difficulty maintaining consistent pedaling under load
Chainrings typically last longer than cassettes, often through 3-5 chains or more depending on material and riding conditions.
Pulley Wheels
Signs derailleur pulley wheels need replacement:
- Excessive side-to-side play
- Noticeable wear on the teeth
- Grinding or rough rotation
- Difficulty maintaining consistent shifting
Pulley wheels are relatively inexpensive and easy to replace. Consider replacing them when they show signs of wear or when doing a major drivetrain overhaul.
Cables and Housing (Mechanical Drivetrains)
Signs cables and housing need replacement:
- Frayed cable ends
- Visible rust or corrosion
- Kinked or damaged outer housing
- Increased friction or "sticky" feeling when shifting
- Inconsistent shifting despite proper adjustment
Generally, replace cables and housing annually or every 5,000-7,000 miles for optimal performance.
Expert Tip
When replacing a worn chain, always test the new chain with your existing cassette before riding. If the chain skips under load, the cassette is likely worn and needs replacement. Installing the old chain back until you can replace both components together is often better than damaging your new chain on a worn cassette.
According to Sheldon Brown's well-respected bicycle maintenance site, mixing a new chain with a worn cassette is one of the most common causes of poor shifting and premature component failure.
Drivetrain Troubleshooting
Even with regular maintenance, drivetrain issues can arise. Here are solutions to common problems:
Chain Skipping
Potential causes and solutions:
- Worn cassette: Replace the cassette if teeth are worn or hooked
- Incorrect indexing: Adjust the derailleur cable tension
- Bent derailleur hanger: Use a derailleur alignment gauge or seek professional service
- Stiff chain link: Identify and flex the stiff link or replace if damaged
Poor Shifting
Potential causes and solutions:
- Cable friction: Clean and lubricate or replace cables and housing
- Improper limit screw adjustment: Reset and adjust limit screws
- Worn shifter mechanism: Clean internally with degreaser or replace shifter
- Dirty drivetrain: Perform a thorough drivetrain cleaning
- Bent chainring: Replace or carefully straighten minor bends
Chain Drops
Potential causes and solutions:
- Improper limit screw settings: Adjust limit screws to prevent over-shifting
- Worn chainring teeth: Replace worn chainrings
- Inadequate chain tension: Adjust derailleur B-screw or chain length
- Incompatible components: Ensure all drivetrain components are compatible
Drivetrain Noise
Potential causes and solutions:
- Dry chain: Clean and properly lubricate
- Misaligned derailleur: Check and adjust derailleur alignment
- Cross-chaining: Avoid extreme gear combinations
- Chainline issues: Check bottom bracket spacers and crankset position
- Worn pulley wheels: Replace if teeth are worn or bearings are rough
Expert Tip
When troubleshooting, change only one thing at a time. This methodical approach helps identify the true cause of the problem rather than making multiple changes that might mask the real issue. Document your adjustments so you can return to previous settings if needed.
Maintenance Schedule by Riding Conditions
Your maintenance frequency should adjust based on your riding conditions. Here's a customized schedule for different scenarios:
Dry/Clean Conditions
After each ride:
- Quick wipe-down of chain
- Visual inspection
Every 150-200 miles:
- Full drivetrain cleaning
- Re-lubrication with dry lube
- Check for chain wear
Every 1,500-2,000 miles:
- Deep clean all components
- Check cassette and chainring wear
- Service or replace pulley wheels if needed
Wet/Muddy Conditions
After each ride:
- Thorough chain cleaning and drying
- Reapplication of wet lube
- Wipe down all drivetrain components
Every 75-100 miles:
- Full drivetrain cleaning
- Check for early signs of corrosion
- Re-lubrication with wet lube
Every 1,000-1,500 miles:
- Complete drivetrain overhaul
- Check all components for wear
- Replace cables and housing if necessary
Winter/Salt Conditions
After each ride:
- Thorough rinse with fresh water
- Complete drying of all components
- Heavy application of wet lube or wax-based protection
Every 50-75 miles:
- Full drivetrain cleaning to remove salt buildup
- Inspect frame and components for corrosion
- Apply corrosion inhibitor to metal parts
Monthly:
- Complete drivetrain disassembly if possible
- Deep cleaning of all components
- Check for salt-related damage
Indoor Trainer Use
Weekly:
- Wipe chain with dry cloth
- Check for sweat drips on components
Every 500 miles:
- Light cleaning and re-lubrication
- Check for chain wear (indoor riding causes less wear)
Seasonally:
- Full drivetrain service before returning to outdoor riding
Expert Tip
For riders who frequently switch between conditions, consider having multiple chains that you can rotate. This system, often called "chain rotation," allows you to extend the life of your cassette and chainrings by replacing all chains before they cause excessive wear to other components.
Electronic Drivetrain Maintenance
Modern electronic drivetrains like Shimano Di2, SRAM AXS, and Campagnolo EPS require specific maintenance approaches:
Battery Care
- Charging frequency: Typically every 1,500-3,000 miles depending on system and usage
- Storage: Keep spare batteries at approximately 60% charge if storing long-term
- Temperature considerations: Avoid charging or storing in extreme temperatures
- Water exposure: While components are water-resistant, avoid submerging junction boxes or charging ports
Connection Points
- Regular inspection: Check all connection points for corrosion or damage
- Junction boxes: Keep clean and ensure proper seating of all plugs
- Charging ports: Keep covered when not in use
- Contact cleaner: Use electrical contact cleaner for stubborn corrosion
Firmware Updates
- Check quarterly: Most manufacturers release periodic firmware updates
- System benefits: Updates often improve battery life, shifting performance, and compatibility
- Procedure: Connect to manufacturer's app or software following their specific instructions
Mechanical Components
- Standard maintenance applies: Despite the electronic shifting, chains, cassettes, and other mechanical components still require regular cleaning and inspection
- Motor units: Keep derailleur motor units clean but avoid direct spray or immersion
- Button maintenance: Clean shifter buttons and interfaces periodically with a damp cloth
Expert Tip
For electronic drivetrains, establishing a regular battery charging schedule prevents unexpected power loss during rides. Many cyclists charge their electronic drivetrains on the first of each month, regardless of use, to ensure consistent performance. According to a 2024 survey of electronic drivetrain users on CyclingTips, preventative maintenance of electronic systems reduced mid-ride issues by over 65% compared to reactive maintenance approaches.
DIY vs. Professional Service
Knowing when to perform maintenance yourself versus seeking professional help is important:
DIY-Friendly Tasks
- Regular chain cleaning and lubrication
- Basic derailleur adjustments
- Chain replacement
- Cassette and chainring replacement (with proper tools)
- Pulley wheel service or replacement
- Cable and housing replacement (mechanical drivetrains)
When to Seek Professional Service
- Complete drivetrain replacement or major component mismatch issues
- Electronic drivetrain diagnostics or internal problems
- Persistent shifting issues despite DIY troubleshooting
- Derailleur hanger alignment (unless you have the specific tool)
- Internal routing of electronic wires or mechanical cables
- Any issues covered under component warranty
Cost-Benefit Analysis
- DIY initial investment: Quality tools can be expensive but pay for themselves over time
- Learning curve: Allow extra time for maintenance tasks while learning
- Regular professional check-ups: Consider professional service annually even if you perform regular maintenance
- Time value: Factor in the value of your time when deciding between DIY and professional service
According to a 2024 cost analysis by Mountain Bike Action, cyclists who perform their own basic drivetrain maintenance save an average of $280-450 annually compared to those who rely exclusively on shop service.
Conclusion
A well-maintained drivetrain is the foundation of an enjoyable riding experience. By following this comprehensive guide, you'll not only extend the life of your components but also improve your bike's performance, efficiency, and reliability.
Remember these key takeaways:
- Consistency matters: Regular, basic maintenance prevents more costly repairs later
- Clean before lubricating: Apply lubricant only to a clean, dry chain
- Replace chains proactively: Modern chains should be replaced at 0.5-0.75% wear
- Adjust for conditions: Modify your maintenance routine based on riding environment
- Invest in knowledge: Understanding how your drivetrain works helps you maintain it properly
Whether you ride a traditional mechanical drivetrain or the latest electronic shifting system, these fundamental principles will help you keep your bicycle running smoothly for thousands of miles.
Share:
Complete Guide to Modern Bicycle Drivetrains: Everything You Need to Know
Bike Chain Lubricant Selection Guide: Choose the Perfect Formula